Choosing the Right Pot and Soil
How to plant mint in a pot – Yo, planting mint is all about keeping it fresh, and that starts with the right pot and soil. Think of it like this: you wouldn’t try to dunk LeBron in a kiddie pool, right? Same goes for your mint – you gotta give it the space and the nutrients to thrive.Choosing the right pot and soil is crucial for a healthy mint plant.
The wrong pot can lead to rootbound plants, while the wrong soil can cause drainage issues and nutrient deficiencies. Let’s break it down.
Pot Selection
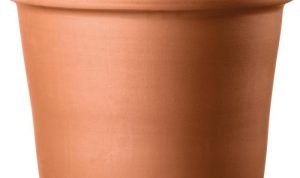
Picking the perfect pot for your mint involves considering both size and material. A larger pot (at least 12 inches in diameter) gives your mint’s roots plenty of room to spread out, preventing rootbound issues. Materials like terracotta are popular because they’re porous and allow for good air circulation, preventing soggy soil. However, they also dry out faster, so you might need to water more frequently.
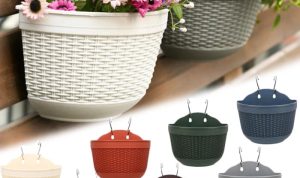
Plastic pots retain moisture better, which is helpful, but make sure you have good drainage holes to avoid waterlogging. Avoid glazed ceramic pots, as these lack sufficient drainage and can lead to root rot.
Soil Composition
Mint needs well-draining soil to prevent root rot. This means a soil mix that allows excess water to drain away quickly, but still retains enough moisture to keep the roots hydrated. A good potting mix will be a blend of organic matter and inorganic materials that balance drainage and moisture retention. Here’s a recipe for a killer custom mint-growing mix:
One part peat moss, one part perlite, and two parts all-purpose potting mix.
This combination provides excellent drainage and aeration, while still holding enough moisture for your mint’s needs. Peat moss retains moisture, perlite improves drainage, and the all-purpose mix provides essential nutrients. You can find all these ingredients at most garden centers.
Potting Soil Comparison
Different potting soils offer varying levels of drainage and nutrient content. All-purpose potting mixes are a good starting point, but they can sometimes be too dense for mint. Coco coir is a sustainable alternative that offers excellent moisture retention and drainage when mixed with perlite. Avoid using garden soil directly in pots, as it tends to be too heavy and can compact easily, leading to poor drainage and oxygen deprivation for your mint’s roots.
The best option for mint is a mix that prioritizes drainage without sacrificing moisture retention, as described in the custom mix recipe above.
Selecting and Preparing Mint Plants
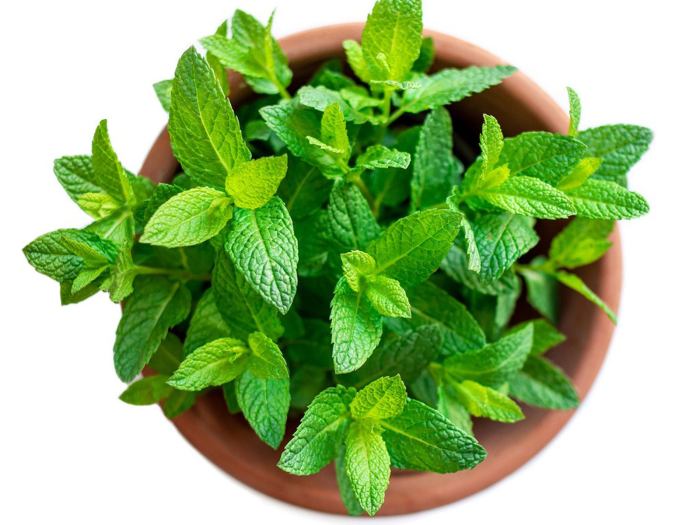
Yo, so you’ve got your pot and soil all prepped for some seriously fresh mint. Now it’s time to get your hands on some mint plants! There are a few different ways to do this, each with its own perks and drawbacks. Let’s break it down.
Basically, you can snag mint plants three ways: from seeds, cuttings, or as established plants from a nursery or garden center. Each method has its own vibe, so let’s explore the pros and cons.
Acquiring Mint Plants
Choosing your mint acquisition method depends on your gardening skill level and how quickly you want to see results. Starting from seeds requires patience, while established plants offer instant gratification.
- Seeds: Starting from seeds is like a gardening marathon – it takes time and patience, but it can be super rewarding. Pros: You get a lot of plants for your money, and it’s a fun challenge. Cons: Germination can be tricky, and it takes much longer to get a decent-sized plant.
- Cuttings: This is the easiest and fastest way to get mint growing. You can often get cuttings from friends, family, or even just snipping a healthy stem from an existing plant. Pros: Super easy, fast growth. Cons: Requires a bit of knowledge about propagation techniques.
- Established Plants: Buying established plants from a nursery or garden center is the quickest route to minty freshness. Pros: Instant gratification! You get a fully grown plant ready to rock. Cons: Can be more expensive than starting from seeds or cuttings.
Preparing Mint Cuttings for Planting
If you’re going the cutting route, here’s the lowdown on prepping them for planting. It’s easier than you think!
Successfully cultivating mint in a pot requires well-draining soil and ample sunlight. For a stylish and durable container, consider crafting your own planter; instructions for creating attractive and long-lasting options can be found by consulting this guide on diy concrete plant pots. These robust pots provide excellent drainage, a crucial factor for healthy mint growth, ensuring your plants thrive for years to come.
- Take the Cuttings: Snip 4-6 inch stems from a healthy mint plant, making a clean cut just below a node (where leaves sprout from). Make sure the cuttings have several sets of leaves.
- Remove Lower Leaves: Strip off the lower leaves from the bottom inch or two of the stem. This prevents rot when you plant them.
- Dip in Rooting Hormone (Optional): While not essential, dipping the cut ends in rooting hormone can boost the chances of successful root development. You can find this at most garden centers.
- Plant the Cuttings: Plant the cuttings in your prepared pot, burying the stripped section in the soil. Gently firm the soil around them.
- Water and Cover: Water thoroughly and cover the pot with a plastic bag or humidity dome to maintain high humidity, which helps with root development.
- Wait for Roots: Keep the soil moist but not soggy. In a few weeks, you should see new growth, indicating successful rooting.
Selecting Healthy Mint Plants
If you’re buying established plants, you want to make sure you’re getting a healthy, vigorous one that’s ready to thrive. Here’s what to look for:
- Look for Lush Green Leaves: Avoid plants with yellowing, wilting, or spotted leaves – these are signs of stress or disease.
- Check for Pests: Carefully inspect the plant for any signs of pests like aphids or spider mites. A healthy plant will be pest-free.
- Feel the Soil: Gently feel the soil; it should be moist but not waterlogged. Avoid plants in bone-dry or overly soggy soil.
- Assess the Root System (if possible): If you can check the roots (some nurseries allow this), look for a healthy, well-developed root system that isn’t root-bound.
Planting the Mint in the Pot
Yo, so you’ve got your awesome pot and some killer mint – time to get planting! This part’s super chill, but getting it right means a mint-tastic garden. Follow these steps and you’ll be sipping mojitos in no time.
Planting your mint is the culmination of all your prep work. A few simple steps will ensure your mint thrives and avoids becoming a super-aggressive overachiever (because mint
-can* be a little
-too* enthusiastic).
Planting Process, How to plant mint in a pot
Here’s the lowdown on getting those mint plants in the ground. Think of it like a super-easy, low-stakes DIY project. Each step is crucial for healthy growth!
- Step 1: Prepare the Pot. Imagine this: your pot, already filled with that awesome soil mix you prepped earlier. Picture it – all loose and ready for action. This is key; don’t skip it!
- Step 2: Make a Hole. Use your fingers or a small trowel to create a hole about the same depth as the mint plant’s root ball. Think of it as creating a comfy little home for your new mint buddy.
- Step 3: Gently Place the Plant. Carefully place the mint plant in the hole, making sure the top of the root ball is level with the soil surface. Don’t jam it in there; be gentle!
- Step 4: Fill and Firm the Soil. Fill the hole with soil, gently packing it around the base of the plant. You want it snug but not squeezed. Think of it like giving your mint a warm hug.
- Step 5: Water Thoroughly. Give your newly planted mint a good watering. This helps settle the soil and gets the roots hydrated and happy. Water until you see it draining out the bottom.
- Step 6: Admire Your Work. Step back and admire your handiwork! You’ve officially planted mint. Give yourself a pat on the back.
Planting Methods Comparison
Choosing between direct planting or starting from cuttings is like choosing between a quick win or a more controlled approach. Both work, but one might be better for your skill level and patience.
| Method | Pros | Cons | Best For |
|---|---|---|---|
| Direct Planting (from a nursery plant) | Faster results, established root system | Can be more expensive, less control over plant health | Beginner gardeners, those wanting immediate results |
| Starting from Cuttings | Cheaper, more control over plant health, potentially more plants | Slower growth, requires more patience and attention | Experienced gardeners, those wanting many plants from one |
Mint Spacing
Spacing is key, my friend. Mint’s a boss, a total powerhouse, and if you don’t give it enough room, it’ll take over your whole pot (and maybe your whole life!). Proper spacing keeps your plants happy and prevents overcrowding.
Ideally, you should have at least 6-12 inches between mint plants in a pot, depending on the size of the pot and the type of mint. Cramming them together leads to competition for resources like water and nutrients, resulting in weaker, less productive plants. Think of it as giving each mint plant its own personal space – they’ll thank you for it with a bounty of fresh leaves!
Providing Optimal Growing Conditions
Yo, so you’ve got your mint plant all settled in its new crib – that’s awesome! Now, let’s talk about keeping that little green dude thriving. Think of it like this: you wouldn’t just drop your phone and expect it to work perfectly, right? You gotta give it the right juice and the right vibes. Same goes for your mint.Mint needs the right amount of sunlight, water, and overall care to really pop off.
Too much or too little of anything, and your mint plant’s gonna be feeling the struggle. Let’s break down exactly what your mint needs to be the freshest, most vibrant herb on the block.
Sunlight Requirements for Mint
Mint loves the sun, but not
too* much sun. Think of it like this
it’s a beach bum, but even beach bums need a break from the scorching rays. Direct sunlight for six to eight hours a day is ideal. Less than that, and your mint might get a little leggy and weak – it’ll reach for the light, looking all stretched out and sad. Too much sun, though? That’s a recipe for crispy, burnt leaves.
So, find a spot that gets plenty of bright, indirect light – maybe a sunny windowsill with a sheer curtain, or a spot in your garden that gets some shade in the afternoon.
Watering Schedule for Mint
Watering your mint is all about balance. You want the soil to be consistently moist, but not soggy. Think of it like a sponge – you want it damp, not dripping wet. Overwatering is a major killer of mint, leading to root rot. How often you water depends on a few things: the size of your pot (smaller pots dry out faster), the climate (hotter climates need more frequent watering), and the season (summer means more watering).
As a general rule, check the soil moisture before watering – stick your finger a couple of inches into the soil. If it feels dry, it’s time to water. If it’s still damp, hold off.
Signs of Overwatering and Underwatering
Overwatering is a common problem, and it manifests in a few ways: yellowing leaves, wilting (even though the soil is wet), and a musty smell coming from the soil. If you see these signs, back off on the watering and let the soil dry out a bit between waterings. You might even want to repot your mint in fresh, well-draining soil to give those roots some breathing room.Underwatering, on the other hand, shows up as dry, brittle leaves that are curling up.
The leaves might also appear to be drooping and generally lackluster. If this happens, give your mint a good soak until water drains from the bottom of the pot. This will help to rehydrate the plant. Make sure you’re paying attention to how often you’re watering to avoid this situation in the future.
Ongoing Care and Maintenance
Yo, so you’ve got your mint plant all set up, lookin’ fresh. Now, let’s keep that minty goodness thriving! Proper care is key to a bountiful harvest of those delicious leaves. Think of it like this: you wouldn’t just plant a tree and forget about it, right? Same goes for your mint.
Mint Fertilizer Schedule
Feeding your mint is like giving it a power-up. Regular fertilizing ensures healthy growth and prevents nutrient deficiencies. Aim for a balanced liquid fertilizer, something like a 10-10-10 formula. Dilute it to half strength—you don’t want to burn those delicate roots! Apply it every 2-4 weeks during the growing season (spring and summer). In the fall and winter, your mint plant slows down, so cut back on the fertilizing or skip it altogether.
Over-fertilizing can actually hurt your plant, so less is more sometimes. Think of it like this: too much protein shakes for your muscles.
Mint Pruning Techniques
Pruning your mint isn’t just about keeping it neat; it’s about maximizing its growth. Regular pruning encourages bushier growth, leading to more leaves. The best time to prune is after a harvest, or when the plant starts to look leggy. Use sharp, clean pruning shears. Pinch or cut back stems to about an inch above a node (where leaves sprout from).
Imagine trimming the ends of a bush to get more leaves and branches. This encourages new growth from the lower nodes. You can also prune back any dead or yellowing leaves. A good rule of thumb is to trim back about 1/3 of the plant’s overall size at any one time.
Preventing and Treating Mint Pests and Diseases
Mint plants are pretty resilient, but they’re not invincible. Knowing how to spot and treat problems early is crucial.
- Pest Prevention: Good air circulation around your plant helps prevent pests. Make sure your pot isn’t overcrowded and that there’s enough space between the leaves for air to flow freely. Regularly inspect your mint for any signs of pests. Early detection is your best defense.
- Common Pests: Aphids, spider mites, and whiteflies are common culprits. If you spot them, you can try hosing them off with a strong stream of water or using an insecticidal soap. Always follow the product instructions carefully.
- Disease Prevention: Avoid overwatering, which can lead to root rot. Ensure good drainage in your pot. Also, make sure your mint gets enough sunlight. A healthy plant is less susceptible to disease.
- Common Diseases: Root rot and fungal leaf spots are common issues. If you notice signs of disease, such as wilting or spots on the leaves, you might need to remove affected parts of the plant and improve the growing conditions. In severe cases, you may need to dispose of the plant to prevent the disease from spreading.
Harvesting and Propagating Mint: How To Plant Mint In A Pot
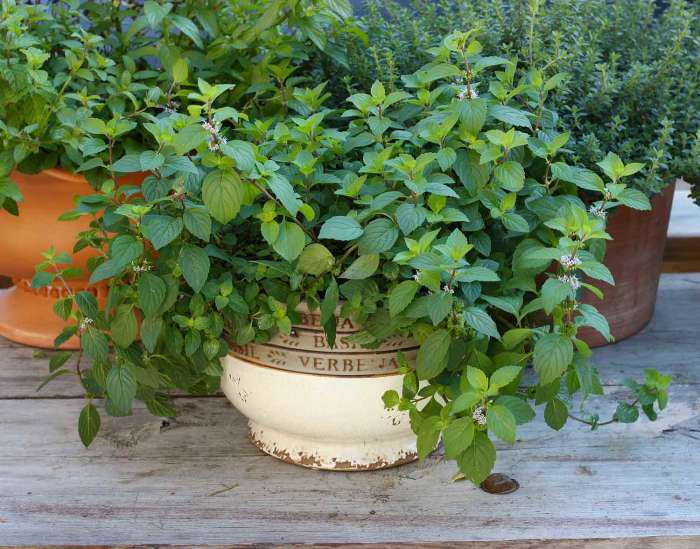
Yo, so you’ve got your mint growing like a weed (which, let’s be real, it kinda is). Now it’s time to reap the rewards of your green thumb and maybe even expand your mint empire. Harvesting and propagating mint is easier than you think, and it’s totally rad to do.
Mint Harvesting Methods
There are two main ways to snag those fresh mint leaves: pinching and snipping. Pinching is perfect for smaller plants or when you just need a few leaves. You gently pinch off the top sets of leaves, encouraging bushier growth. Think of it as a little haircut for your mint. Snipping, on the other hand, is for when you’re going for a bigger harvest.
Use clean scissors or pruners to cut stems, aiming for about 1/3 of the plant’s height. This keeps the plant healthy and promotes new growth. Always harvest in the morning after the dew has dried to prevent rot.
Mint Propagation Methods
Ready to level up your mint game? Propagation is your key to a mint takeover. Here are some chill ways to get more mint plants:
- Stem Cuttings: This is like cloning your mint. Take a 4-6 inch stem cutting from a healthy plant, remove the lower leaves, and dip the cut end in rooting hormone (optional, but helps). Stick it in water or moist soil, and keep it moist until roots develop. Once roots are established, plant it in a pot. Easy peasy.
- Layering: This method is super low-key. Bend a stem to the ground, and bury a section of it in the soil, leaving the tip exposed. Secure it with a rock or peg. Roots will develop from the buried section. Once the new plant is established, separate it from the mother plant.
- Division: If your mint plant is getting a little crowded, you can divide it. Carefully remove the plant from its pot, and gently separate the root ball into smaller sections, each with its own roots and stems. Repot each section into its own pot. This is a great way to refresh an older plant and get more mint plants at the same time.
Mint Varieties and Harvesting Times
Different mint varieties have slightly different growth cycles, affecting the ideal harvest time. Here’s the lowdown:
| Mint Variety | Ideal Harvest Time | Notes | Flavor Profile |
|---|---|---|---|
| Spearmint | Summer (June-August) | Multiple harvests possible | Sweet, refreshing |
| Peppermint | Summer (July-September) | Stronger flavor after flowering | Cool, strong |
| Apple Mint | Summer (July-September) | Fragrant, fruity aroma | Sweet, apple-like |
| Chocolate Mint | Summer (August-October) | Unique chocolatey undertone | Sweet, chocolatey |
FAQ Insights
Can I use any type of pot for growing mint?
While many pots work, terracotta pots are ideal due to their breathability, preventing root rot. Ensure adequate drainage holes.
What if my mint plant starts to wilt?
Wilting usually indicates either underwatering or overwatering. Check the soil moisture; if dry, water thoroughly; if soggy, allow the soil to dry out before watering again.
How often should I fertilize my potted mint?
Feed your mint plant with a balanced liquid fertilizer every 2-4 weeks during the growing season (spring and summer).
What are the signs of pests or diseases in my mint?
Look for discoloration, wilting, or unusual spots on leaves. Inspect for insects like aphids or spider mites. Treat infestations promptly with appropriate insecticides or organic remedies.

